Monday, April 04, 2011

Book Report and School Play


During the month of March, Little Sis was one busy little girl!  For the past several weeks, she has been working on her first big book report project and school play.  At the beginning of March, all the second graders were assigned to pick their favorite animal.  The first week of April she will being sharing her book report to her classmates. John took Sissy to the public library.  She narrowed down her choices to parrots, monkeys, chameleons, and elephants.  After reading books about those animals, she decided to do her book report on elephants because she has two plastic elephant toys, which will be handy for the book report display.  She checked out two books about elephants.  She has been slowly researching and answering questions like the following:


Where do they live? They are found in rainforests and deserts.
How long do they live?  Elephants can live up to 60 years, wow! They lose their teeth before they die.
How big do they get? They can grow up to be 10 feet tall!
What is an usual elephant family? It consists mothers, daughters, sisters, and babies.
What do they eat? They love grass, bushes, and leaves.
Do they know how to swim? Yes, they love to swim and can swim in the ocean.
What is the difference between African and Indian elephants?
African- Their back dips, have large ears, curved forehead, have two long tusks, and deep ridges on their trunks.
Indian- They have a rounded back, smaller ears, domed forehead, shorter tusks, and smoother trunks.


We, as a family, helped her put together a diorama (a shoe box display).  She drew some clouds, cut out leaves, and glued on some pieces.  She and Daddy decided to make a grassland, pond, and desert out of colored contraction paper to represent where they are found.  John also made a tree trunk. Big Sister and I helped her make a sun, flowers, grass, lily pads, and water lilies.  Sister placed the elephants in the box. We tried to accomplish a 3D effect by bending some pieces to stick up and using foam (raising height on a flat surface)!  On the back of the shoe books, there is information about her animal, which she will share with her class.  We are very happy with the end result.  She cannot wait to share it with her teacher and classmates.


As for the Glow play, her second grade class did an incredibly cute job!  The play was about birds, bugs, flowers, and insects.  They talked about each insect, bird, etc wonderful qualities.  Little Sister was a dancing butterfly.  They sang a lot of fun songs too.  I loved all the props and costumes!  It was such a darling play! 


They sang a couple songs with flowers.


Sissy with her best friend.  


My dancing butterfly!


She wore an orange flower too!


During one of the songs, they got to shine a small flash light!  


The beautiful dancing butterflies (Sissy is on the right with orange wings).


Overall, it was a great busy month for her.  Now she is looking forward to her 8th birthday party in a couple weeks and being baptised a member of  the Church of Jesus Christ of Latter Day Saints on May 7, 2011. Go Sister!  Yay!


Monday, March 28, 2011

2011 Goal Check List

My to do list and what I have accomplished so far this year:


Get Organized:

  • Finish typing or copy/pasting recipes.
    • Print out and organize recipe pages into my binder.
  • De-clutter my house!
    • Go through clothes, toys, games, old beddings, videos, DVD's, books, electronics, etc.
    • Donate things to DI.
    • Organize craft supplies.
    •  Get new beddings, sheets, pillow cases, pillows, etc for kids and us.
  • Organize my activity day leader book.
    • Update their goals, which they have passed off recently.
    • Add incoming girls and their birthdays to my book.
    • Plan four months worth of activity day ideas.
    • Type and print out a calendar of the next few months of activities.
  • Plan and prepare for my youngest daughter's 8th birthday party!
    • Do a very cheap butterfly theme.
    • Make home-made birthday invitations.
    • Buy a cheap flower or butterfly piƱata and buy candy at dollar store.
    • Make flowers and butterflies garland.
    • Make a Happy Birthday banner.
    • Make butterfly cupcakes.
    • Make the game pieces for stick the spot on a butterfly.
    • Make a CD for musical chairs game.
    • Use leftover butterfly party supplies from oldest daughter.
    • Collect recyclables (toilet paper rolls and egg cartonsand buy missing craft supplies for butterfly and caterpillar crafts.
    • Make the toilet roll butterfly and caterpillar crafts as decoration and examples for the birthday party.
    • Make caterpillar hair-clips.

Spiritual Goals:

  • Improve on personal prayers and scripture study!
  • Improve on church attendance and tithing/fast offerings.
  • Have Family Home Evening every week.
  • Go to temple with Husband.
  • Write in gratitude journal.
  • Read conference talks from the Ensign.
  • Go to Enrichment night! (Yay, I went to the Relief Society Birthday Dinner)!
  • Family prayers and scripture study.

Health and Fitness:

  • Work out 5 times a week mixing up the workout routine (weights, running, Turbo Jam (kick-boxing), P90X, etc.  The more different activities that I do, more than likely it will confuse my body to lose weight.
  • Slowly purge sugar out of my diet!  Try eating South Beach Diet for a couple weeks to notice any changes in metabolism.
  • Get a six month recreation pass to the gym.  Use the elliptical, treadmill, stationary bike, weights, and take a zumba class.
  • Make a new iTunes workout mixture of up beat music for my iPod nano.

Meal Plans:


Educational Goals:

  • Apply to Salt Lake Community College.
  • Apply for financial aid.
  • Obtain College transcripts and hand deliver them to SLCC.
  • Do new student orientation and meet with an advisor.
  • Apply to nursing program May 12-25, 2011.
  • Register for classes in the fall 2011.  Sign up for the following classes: nutrition, math 1025 pharmacology, a fun fitness class, and some time in the future pathophysiology (as soon as I find out when I will start my nursing program).
Look for a job in health care:

  • Get food handler's permit
  • Get CPR certified
  • Apply for jobs on crag's list,newspaper classifieds, Job Workforce Services, etc.
Reading:
Scrapping:
  • Install Adobe Photoshop Elements on my new desktop computer.
    • Call Customer Service about registering the license since there was a problem.  Thankfully they allowed me to register the software on my new computer since the old desktop died.
  • Scrap 2-5 layouts per week.
Financial:
Developing Talents: 
  • Do a craft at least once a month.
  • Cut out 4"X4" wooden blocks. Come up with a design using scrapbook paper and stencil lettering our last name FREE on the blocks.
  • Do something creative for my visiting teaching sisters.
Self Reliance:
  • Strawberries will be in season soon, which means the cost of buying them should go down!  I better start learning how to make some freezer jams and strawberry sauces.

Thursday, March 17, 2011

Happy St. Patrick's Day

Today we had a lot of fun celebrating the holiday.  My husband made scrambled green eggs and ham (topped with melted cheese) for breakfast while my girls and I did nail manicures.  We painted our finger nails neon green and a green glittery clear coat on top.  
Here are my girls wearing their green lucky charms!
Later in the afternoon, I did some visiting teaching.  It was my turn to teach the lesson this month.  I gave my visiting teaching sisters a bag of gold chocolate coins and a note that said, "We are so lucky to know you!"  
The Supplies
Lucky Shamrock St. Patrick's Day Card
White and green card-stock paper
Green ribbon
small heart shaped cookie cutter
Green paint( I used green finger paint)
Chocolate gold candies in a mesh sack
Pens or markers (green and black) 
Paper hole punch
Stamp the clover using a small heart shaped cookie cutter on white card-stock paper. Allow the green paint to dry.  Cut some green ribbon out.  Cut out a square around the dry painted clover and glue on the white paper on top of green paper. Cut around the edges so that it looks straight and uniformed.  With the hold puncher, press a hole through papers and pull the ribbon through the mesh candy sack .  Add the following text with a marker: "I'm lucky to know you!"   
After school, the girls were surprised to find out that a tiny leprechaun visited our house  today.  "He" filled the toilet tanks with green food coloring.   He left some shamrock clues for a scavenger hunt. There were (lucky seven) shamrock clues and messes around the house for the girls to find. At the end of the hunt, they found some gold coins and "I am lucky to have you" paper design from The Crafting Chicks. The clues were the following:
Front Door: Warning A Leprechaun was here!  Find his clues written on shamrock near his messes he made.  Start in the living room.  Ready set Go!!!
Clue 1. Rainbow Balloon Mess: Find #2 mess in Kitchen Ha ha ha!
Clue 2.  Homework Mess: Find #3 mess in laundry room.
Clue 3.  Toilet Paper Mess: Find #4 mess in your bedroom.
Clue 4:  Laundry Mess: Find #5 in Mom and Dad's Room
Clue 5: Bed Pillow Mess:  Find #6 mess in Mom and Dad's master bathroom.
Clue 6: Nail Polish Mess:  Find #7 in a green plant in living room.
Clue 7: Hidden in Living Room Plant: Look under the bed on the side that snores to find your surprise! (Dad's side of bed).  LOL!!!
Surprise!  I'm so LUCKY to have YOU!
They were very happy to eat chocolate coins for their after school snack!
At dinner, we talked about the history of St. Patrick Day.  As for the amazing food, we decided it would be great to try a traditional Irish meal.  We got some corned beef and cabbage on sale at Smiths.  We made Slow Cooker Corned Beef and Cabbage, which I got the recipe from Family Fun.  With our bread maker, we made a garlic and herb crusty bread.  I made a simple green fruit salad.  As for our drinks, we had apple beer (non-alcoholic of course).
Rainbow Fruit Salad
Strawberries
Peaches or mandarin oranges
Bananas or pineapple
Green grapes
Blueberries
Purple grapes 
Sweetened Whipped Cream (see below for recipe)
Small Green Jello Mix
Cut up the fruit into bite size pieces and add to a medium size bowl.  Toss together the many fruits.  Beat the sweetened whipped cream mixture.  Add cream to fruit and  pour in the green lime Jello package. Gently stir together and allow the fruit salad to chill for a couple hours before serving.
As for dessert, the kids absolutely loved helping me make the rainbow cupcakes, which we got the recipe from Family Fun.  Here is the recipe:
Taste a Rainbow Cupcakes
White cake mix
Food coloring (red, blue, green, and yellow)
Baking cups
Sweetened whipping cream (for the cloud)
Rainbow sprinkles
Follow the directions on the cake package.  Divide the batter evenly among six small bowls.  Follow the chart below, dye each bowl of batter a rainbow color.   Line the muffin tin with baking cups.  Add purple, then blue, green, yellow, orange, and red evenly.  As you go, gently spread each layer of batter with the back of a spoon to cover the color underneath.  Bake the cupcakes according the cake box directions.  Before severing remove the paper wrapping, and top with whipped cream "cloud" and dash some rainbow sprinkles.
 Food Coloring Drops Chart
Purple:  9 red and 6 blue drops
Blue:  12 drops
Green:  12 drops
 Yellow: 12 drops
Orange:  12 yellow and 4 red drops
Red:  18 drops
Sweetened Whipped Cream (Our Best Bites)
1 c. Whipping Cream
1/3 c. powdered sugar
Combine whipping cream and powdered sugar in a large bowl.  With an electric hand mixer, beat whipping cream until soft peaks form.
It was a busy day! We made a lot of fun memories today! The girls especially got a kick out of the leprechaun scavenger hunt!  I hope you had a wonderful Green day!  Take Luck!!!  ~Jen

Tuesday, March 08, 2011

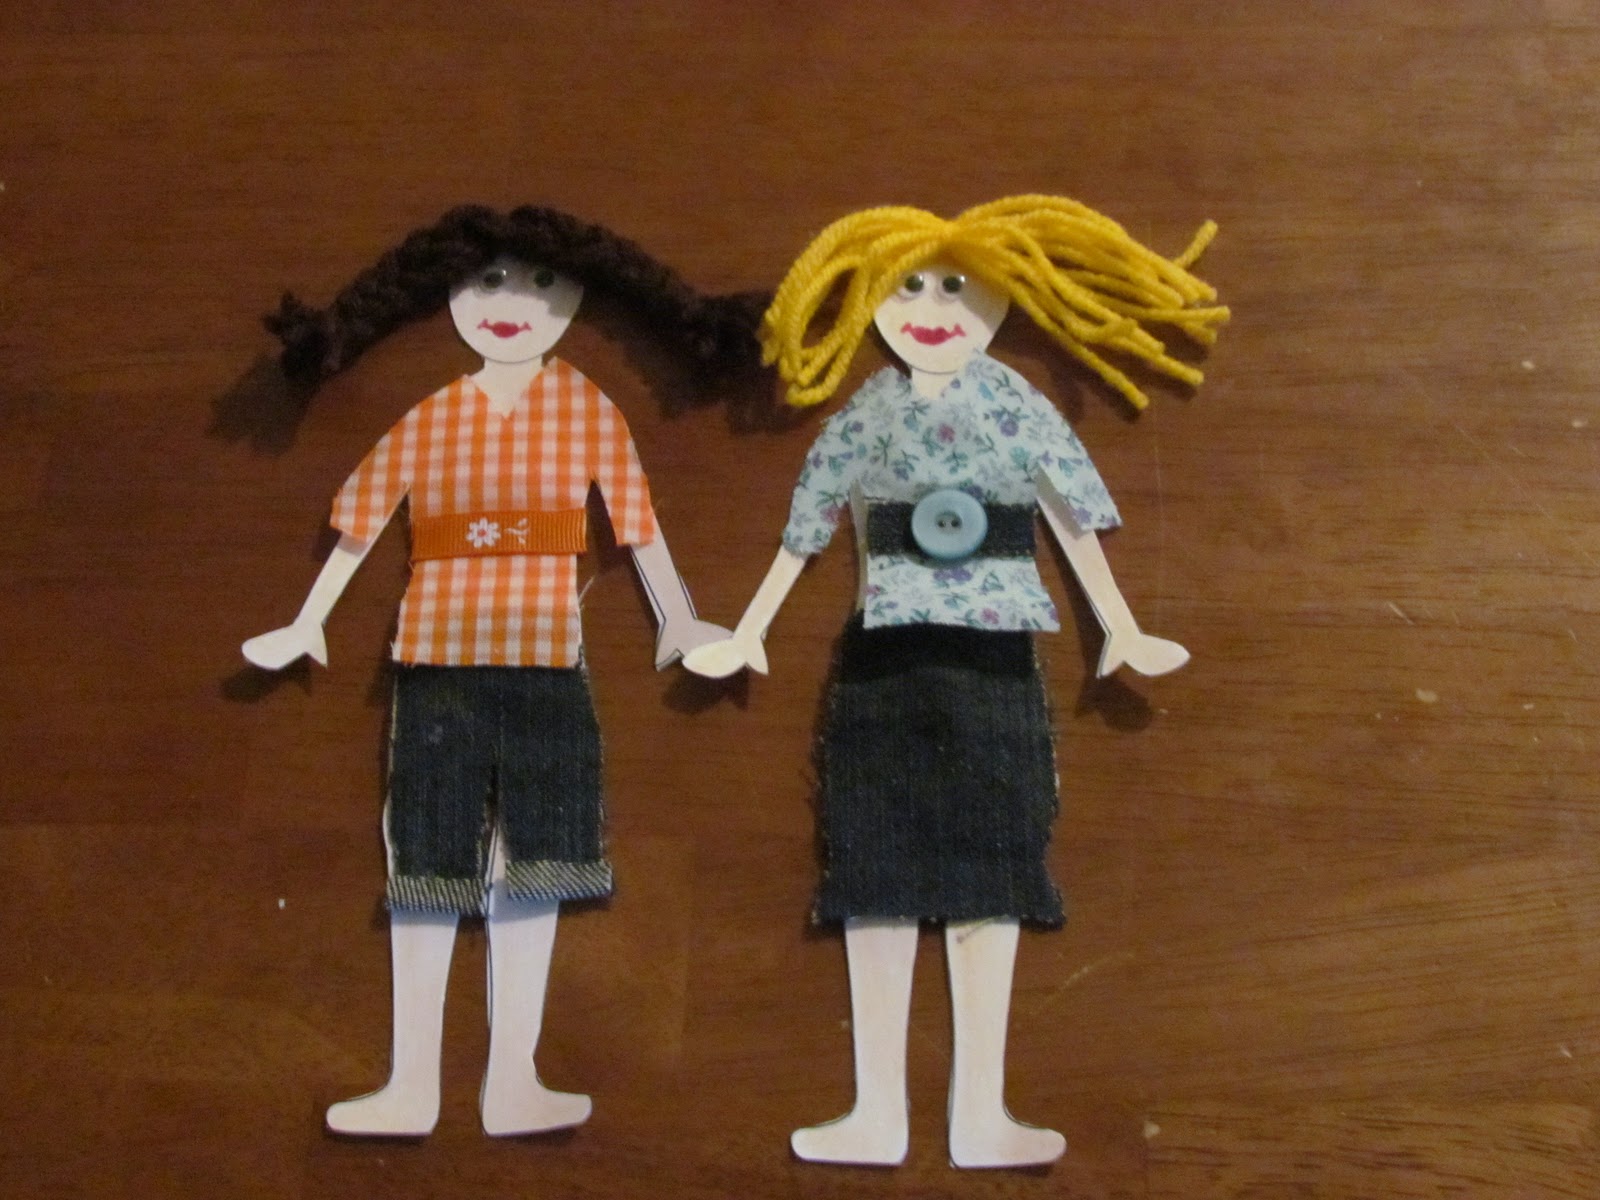
Simple Groovy Paper Dolls

Groovy Paper Dolls
Today was Activity day.  My co-leader and I decided we should do a lesson on modesty with our 8-11 year old girls in our ward. When I was a little girl, I loved playing with paper dolls.  I recall having the paper dolls with clothes that had a tiny folded pieces that kept the clothes on the doll's body.  I decided that crafting paper dolls during our modesty lesson would be a fun activity for the girls.  For the last three days, I have been creating paper doll supplies. Material scraps, old ripped jeans, scissors, yarn, glue gun, buttons, ribbons, have been scattered all over my bedroom floor.   While visiting my in-laws this past weekend, I had the privilege of using my mother in-laws vintage scrap material to make the doll clothes.   The material is from the seventies and early eighties!  I can imagine many blankets, doll clothes, and kid's clothes were sewn using these material scraps.  They are so groovy and the girls absolutely loved them!  They were commenting on how they would wear most of the fashion designs I came up with.
Here are some of the outfits that I made using the vintage material scraps.
I made denim shorts, skirts, and  jeans out of my girl's old ripped jeans.
Paper Doll Supplies:
paper doll body found at Wendy's Activities
card-stock paper 
material, denim jeans scraps, and felt 
scissors, glue/ Velcro,
glue gun and glue sticks
yarn (yellow, red, brown, and black)
buttons and ribbons
Wiggly Eyes
crayons, pens, markers, or pencils
Instructions: Make a pattern for the dress, shirt, pants, shorts, skirt, swimsuit, etc by tracing around the paper doll's body. Pin the pattern on material and cut it out.  Add embellishments like ribbon, felt, and buttons for a belt or shirt designs.  I used the hot glue gun to apply the ribbon, buttons, extra fabric pieces, etc. I created many different hair styles, short, long, medium length, bangs or no bangs, pigtails, braids, and straight hair down. Draw lips with a red marker and color the body with crayons.  Cut out the "model" (use card stock paper).  Next, glue the wiggly eyes and hair on the face.  During my activity, I had my girls glue the clothes on the body.  At home, I applied Velcro pieces to the doll and clothes so that they could change the doll's clothes.
  
We each did two paper dolls.  Little Sister's dolls are on the left, mine are in the middle, and big Sister's dolls are on the right.  They were so much fun to make!  I think they are darling if I say so myself, LOL!
Here are some of our favorite paper doll fashions.


While the girls worked on their paper dolls, I read some information on modesty and my co-leader did an object lesson.  My co-leader got a Glamour magazine and read an article about Blessings from the Friend.  The girls were so confused looking at the cover of the magazine of a model dressed in a sleeveless sun dress and wondered how some church related material would be in the middle of Glamour magazine.  One girl said, "Did that article really come out of that magazine?"  At the end, she pulled the Friend page out of the book and explained to the girls that we need to be careful with how we choose to dress because we send the wrong message to others when we don't dress modestly.  Next, my co-leader showed the girls her vintage paper doll books from the 1940s-1950s.  We were surprised to notice that during World War II the women's fashion were very modest but after the war the skirts got shorter and the tops became too low or sleeveless.   After some of the girls were done making their paper dolls, my co-leader had them look through the Glamour magazine to try to find some modest fashion as well as pick out the indecent clothing.  They shared the results with the rest of the group by indicating the well dressed models as circled verses the not modest clothing with a large X!  I sent the girls home the modesty material that I read to them as well as a bookmark titled: Modest is Hottest that included some modesty quotes like the following: "What you wear tells others who you are."  "Dressing modestly invites the Holy Ghost. When you are well groomed and modestly dressed, you can influence others for good."  "What you wear shows your respect or disrespect for places you go and people you're with. My favorite quote is : What you put on your body 'talks' And everyone who sees you 'hears' what you're saying."  Tonight after doing homework and reading, little Sis wanted to play with the paper dolls at the dining table.  Good times are ahead for this little girl by playing with simple paper dolls!  What a wonderful activity planned and finished! Yay,  I was so happy that six girls showed up today and had a blast!  Now I can rest after all that hard work!  Whew!

Kielbasa and Shells


This recipe is basically like mac and cheese but better.


1 package of pasta (shells of any size, you can use others a well)

1 turkey kielbasa or polish (beef/pork) sausage
1 package of Swiss cheese slices
1/4 cup of butter
1/2 cup of milk


Chop the kielbasa into bite size pieces.  Boil the shells with the kielbasa (no need to add salt or oil due to having the meat boiling with the shells).  Drain the water and add the slices of Swiss cheese, milk, and butter.

Friday, February 25, 2011

Carl Bloch BYU Art Exhibit


 “Christ Healing the Sick at Bethesda" By Carl Bloch


For Activity Day this past week, my co leader and I took the girls to the Carl Bloch Art Exhibit at BYU Museum of Art.  


We printed out our free tickets and parking pass before driving south to Provo.   Carl Block (1834-1890) was a well known Lutheran Danish artist.  Most of his art can be found in Denmark and Sweden mostly in Lutheran churches and castles.  BYU did a magnificent job in displaying his beautiful oil painting and etchings.  I have always been a fan of Carl Bloch's work!  It is probably due to the fact most of his religious works are in the LDS church publications, books, primary materials, etc..   I absolutely loved looking at his etchings.  I felt strong emotions while looking his beautiful etching of Christ.  Maybe someday I will buy a print along with a pretty frame to display on my wall in my bedroom so that He is the first person I see when I wake up in the morning... 


Portrait of Christ


Bloch portrayed many phases of Jesus Christ's life. He had etchings of his birth, healing the sick, raising the dead, His death, resurrection, and so forth.   It was so exciting to see his real oil paintings and etchings on the wall instead of prints.  Some of the paintings were worn and cracked from age still absolutely breath taking.  


 If you live near the Utah area, I highly recommend you go see Carl Bloch: The Master's Hand Art Exhibit!  It will be going until May 7, 2011 and I doubt his works will ever be back like this exhibit!  It was an amazing experience to see his masterpieces that I will never forget!  

Wednesday, February 23, 2011

Happy Hubby= Fabulous Food and Football!


At the beginning of the month, John had to teach a special training for the new employees.  To his surprise, he found out he was picked employee of the month for the month of January!  Way to go, babe!  He received a certificate as well as three gift cards to the following places: Cafe Rio, Chilis, and Maggie Moo's Ice cream!   Yum, we look forward to eating at those amazing places in the near future!


We went to a super bowl party at a friend's house a couple weeks ago.  Hubby and I were in charge of bringing hot wings and mint brownies! So you can imagine how excited my husband was to create delicious spicy hot wings!  We were up until 2:00 AM early Sunday morning frying them.  On Super Bowl Sunday, I wore my green sweater and proudly added a few more drops to the mint brownie's frosting to establish which team I was hoping to win!  The funny thing is the boys were cheering for the Steelers and the girls were Packer fans!  The kids had a blast dancing at half time to The Black Eye Peas!   Below are the recipes that we used to make our amazing Super Bowl goodies!


Chicken Wings
1/2 cup flour
1/4 tsp. paprika
1/4 tsp. cayenne pepper
1/4 tsp salt
10 chicken wings
oil for deep frying

In a small bowl mix together the flour, paprika, cayenne pepper, and salt.  Place chicken wings in a large nonporous glass dish or bowl and sprinkle flour mixture over them until they are evenly coated.  Cover dish or bowl and refrigerate for 60-90 minutes.  Heat oil in a deep fryer to 375 degrees F (190 degrees C).  The oil should be just enough to cover wings entirely, an inch or so deep.  Fry coated wings in hot oil for 10-15 minutes or until parts of the wings turn brown. Remove from heat, place wings in a serving bowl, add hot sauce mixture and stir together.  Serve.  


Sauce
1/4 c butter
1/4 c. hot sauce
1 dash of black pepper
1 dash of garlic pepper


Combine the butter, hot sauce, pepper, and garlic powder in a small sauce pan over low heat.  Stir together and heat until butter is melted and mixture is well blended.  Remove from heat and set aside for later to coat after the wings are fried.


Our thoughts:  This was definitely a tasty recipe with a hint of heat!  We didn't bother putting them in the refrigerator.  We fried the wings from a frozen state and they turned out just fine because we made sure the oil was 375 degrees.  John made a batch with some wings dipped in milk, then coated the wings in the fry batter mixture, and added some honey.  They turned out black, but didn't taste burnt.  We figured the sugars from the honey and milk speed up the browning process while frying.  They had a nice sweet flavor, but I hated the color of them, ack!  So I made sure we had a brown batch, which was accomplished by following the directions.  The wings were great with Hidden Valley Ranch Green Onion Dip and a side dish of some carrots and celery sticks too.  The next day, we put them in the oven at 250 degrees to warm them up.  The recipe is a keeper and we look forward to making them again!


Recipe by Our Best Bites

Brownies:
4 squares unsweetened baking chocolate (4oz)
1 C butter (2 sticks)
4 eggs
2 cups sugar
1 tsp vanilla
1 1/4 C flour
1/2 tsp baking powder

Frosting:
2 C powdered sugar
4 T butter, softened
1 1/2 tsp peppermint extract
1-2 Tbs milk 
green food coloring

Chocolate Glaze:

6 oz (about 1 cup) semi-sweet chocolate chips ,you could also use dark
6 Tbs real butter


Preheat oven to 350 degrees. Line a 9x13 inch pan with foil making sure the foil extends over the edges by at least one inch.  Lightly spray with non-stick spray and set aside.  Chop both unsweetened chocolate and two sticks of butter into chunks and place together in a microwave safe bowl.  Microwave in 30 second intervals, stirring in between, until just melted and smooth.  Set aside to cool, stirring occasionally. With an electric mixer or stand mixer beat eggs, sugar, and vanilla for 2 minutes.  While egg mixture is beating, measure out flour and combine with baking powder.   While mixer is running, slowly add melted chocolate and beat to combine.  Turn beater speed to low and add in flour by spoonfuls.  Mix just until combined.  Pour batter into prepared pan and bake for 20-30 minutes or until a knife poked in center comes out clean.  Cool completely on a metal rack. When brownies have cooled to room temperature, prepare frosting.  Combine all frosting ingredients, starting with 1 1/2 tablespoon of milk, and beat until light and fluffy.  Add more milk by teaspoonful as needed.  Spread frosting evenly over brownies and then place brownies in fridge to chill.   While brownies are chilling prepare chocolate glaze.  Place chocolate chips and 6 tablespoons butter in a microwave safe bowl.  Microwave in 30 second intervals, stirring in between, until just melted and smooth.  Set aside to cool for about 15 minutes and then carefully spread on top of the frosting layer.  Return pan to fridge to cool.  When chocolate has hardened, use edges of foil to remove entire brownie from pan.  Cut into squares and serve.


Our thoughts:  Beware, these are truly amazing brownies that you won't be able to resist!  This is by far, my most favorite mint brownie recipe ever! I've tried many mint brownie recipes too (never found one that I truly liked until now!) They are rich brownies but not terribly sweet due to the semi-sweet chocolate chips and unsweetened chocolate. I loved baking them with the foil method.  Not only was it easy to clean the baking pan, they were so simple to cut into small squares and serve. I ate way too many of these delicious brownies and enjoyed every bite of them!  MMMMMM GOOD!